
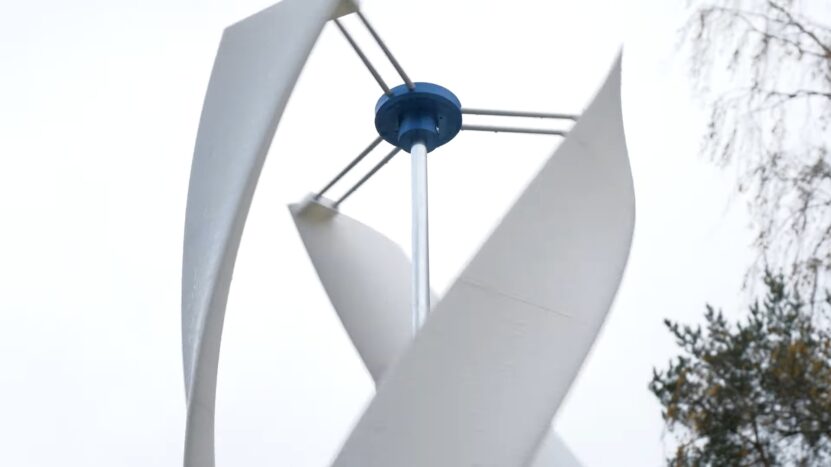
In this project, we will build a small DIY VAWT, Vertical Axis Wind Turbine. We are not expecting to get much over 50 watts of production, though it would be fairly simple to double the size of the blade area to increase power.
This DIY VAWT is based on the use of 4 inch PVC pipes, cut in half, for the blades. The blades are mounted on bicycle rims. This structure is then mounted using 2×4’s and a DC treadmill motor is connected at the bottom, via a belt. The belt connection allows for an increase in RPMs to the treadmill motor.
We have just started this project and have concerns with the following:
- start-up wind speed required – the gearing required to increase the RPMs for the treadmill motor, could prevent the wind turbine form starting, till very high wind speeds are reached
- gearing ratio – will a belt gearing system give us the revolutions per minute (RPM) that we need to produce usable power?
- total power – the 50 watt output is a guess based on similar VAWT designs.
UPDATE: our concern with the gearing and start-up winds speed held true. The beast would only run under extreme wind conditions. We are looking for a bigger pulley for the treadmill motor and will need to retest.
Materials:

- 2 bicycle rims – 22 inc
- 3 PVC pipes – 4 inches by 10 feet
- 1 treadmill motor – ebay – $20
- 18 screws to screw the blades to the rims
- 2×4’s as required for building the frame (4 – 8 ft long)
- 2×6 – to mount the treadmill motor
- 6 inch post bracket – hang top bicycle rim
- V belt – length dependant on setup (79 “)
- cover for motor (plastic 2 gal pail)
Assembly:
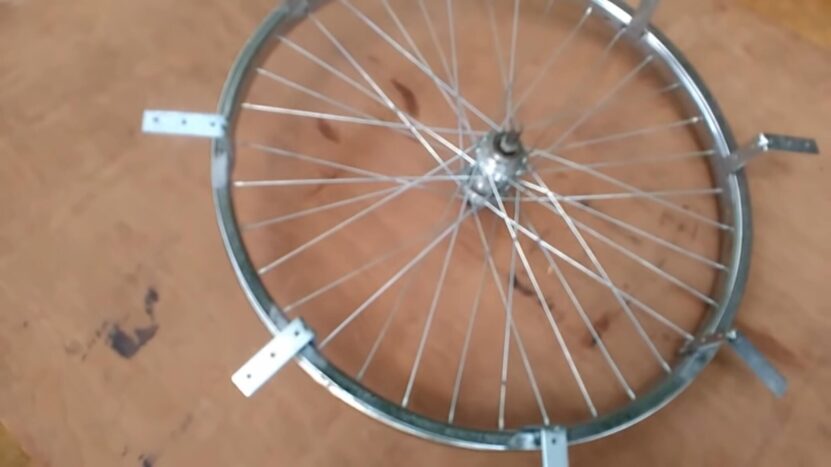
- Remove every other spoke in the bicycle rims. Then tighten the remaining spokes.
- Inspect and grease the rim bearings – replace if required
- Cut PVC pipe in half so you have a half-moon shape, 10 feet long
- Measure the 10 foot pipes and cut exactly in half – mine were 10′ 1″. NOTE: You may want to try the VAWT with the full 10 foot lengths, as these shorted 5 foot lengths would not produce enough power to startup our high-ratio geared treadmill.
- Insert one end of blade into the space between the spokes and drill an 1/8 inch hole. Use metal screw to attach PVC blade to the rim.
- Do the same, to the opposite end of that blade – hold in place and drill a hole. Then attach with a screw.
- Attach the second blade on the opposite side, in the same manner.
- the 3rd and 4th blades are evenly spaced on the rim, to give it structure.
- NOTE: I left every other hole (space in the spokes) empty. I found that using every available slot appeared to block the wind – this will be tested later to determine the effect of adding more blades, as the rims will hold 18 blades and I only have 9 blades at the moment.
- Install the remaining blades. With a 22 inch bicycle rim, I used 9 blades in total.
Frame
I attached the blades to the bicycle rims, so the “best” bearings would hold most of the weight. The idea behind the frame, is to “hang” the VAWT from the top rim, so the weight is spread between the top and bottom rim bearings. The exact length of your frame may vary, if your 10 foot PVC blades were a little longer or shorter than mine.
We will build a frame around the VAWT, with a couple of inches to spare on the sides, and exact measurements for the top and bottom. For extra support we’ll also build a frame at 90 degrees, which will house the treadmill motor.
- Cut 3 pieces of 2×4, 32 inches in length. With 22 inch rims, this leaves lots of room on either side of the frame. One piece will go at the bottom of the frame and 2 will go across the top of the frame.
- Cut 2 pieces of 2×4, approximately 72 inches in length, for side rails. The length can vary as we’ll place the top horizontal beams according to the height of the blades.
- Screw the bottom beam (32 inch 2×4) into both side rails. Have the 32 inch board UNDER the side rails and screw up into the rails. You want this overlap as the top beams will also be placed “along” the rails. The INSIDE measurement between the rails, will be about 29 inches.
- Drill a hole about a 1/2 inch deep in the centre of the bottom beam. The bottom wheel rim will slide into this hole.
- Measure the distance from the bottom of the wheel rim, to the top of the opposite wheel rim. Screw the top beams into the rails, at a height, 1 inch above this length. This will allow us to adjust the bolt on the bicycle rim, to remove most of the weight from the lower wheel bearing.
- Cut a piece of 2×6, 24 inches long. This board will help to stabilize the wind turbine and will also be used to attach the treadmill motor.
- Using a piece of plywood, cut in a “T” shape, attach the 2×6 to the bottom beam (2×4). The 2×6 needs to be at the centre of the bottom beam. I placed the plywood, “under” the frame and screwed it into both the 2×6 and the beam. We will attach the treadmill motor at a later stage.
- Slide the rims and blades into the hole in the bottom beam. Place the 6 inch post bracket over the top rim. Move the top of the rim/blade assembly into place (centre). Screw the 6 inch post bracket into the top two beams. Ensure the bracket is centered over the lower beam. Also ensure that the 6 inch post bracket is at such a height, that you can tighten the top nut on the wheel rim, lifting weight off the bottom rim bearing.
- Adjust the top rim nut to remove most of the weight from the bottom wheel bearing, but still leave the wheel sitting in the hole we had drilled in the bottom beam.
Treadmill Assembly
I am using a rather large treadmill motor that needs more RPMs to produce usable power, than a simple VAWT such as this, can produce. Thus we will try using the bottom bicycle rim and a V belt, to ramp-up the motor
- Cut a piece of 2×6, 20 inches long. And other piece of 2×6, 4 inches long.
- Attach the shorter piece of 2×6, to the 20 inch piece as per this picture. This piece will be used to screw the treadmill motor support down to the bottom 2×6 we attached to the bottom of the Frame Assembly.
- Place the treadmill motor against the 20 inch board, with the pulley facing down.
- Align the pulley to the bottom bicycle rim and mark the 20 inch board. Attach the treadmill to this board
- Slide the “V” belt, under the blade assembly and place into the bicycle rim. Thread the V belt through the treadmill pulley. Place the treadmill motor so there is some tension in the V belt. I left this a bit “loose”. Screw the treadmill motor assembly onto the lower 2×6 board.
- I also attached some steel strapping to the top and bottom of the treadmill motor support, to keep this board in place.
- COVER: following the “reuse” theme, I placed a 2 gallon “cat litter” pail over the motor. This plastic pail completely covers the motor, but does not touch any moving parts.
- NOTE: our first tests using a 2 inch pulley on the treadmill motor, was not encouraging. We are now looking for a larger pulley for the treadmill so it’s not geared so high.
Frequently Asked Questions
Can this DIY VAWT be scaled up for higher power output?
Yes, the design can be scaled up by increasing the size of the blades and the frame, but this may require stronger materials and possibly a more powerful motor.
Is it possible to use a different type of motor instead of a treadmill motor?
Yes, other DC motors can be used, but it’s important to match the motor’s specifications with the expected RPM and power output of the VAWT.
How does weather affect the performance of the VAWT?
Extreme weather conditions like heavy rain, snow, or high winds can impact the performance and durability of the VAWT. It’s important to consider weatherproofing in the design.
What maintenance is required for a DIY VAWT?
Regular maintenance includes checking and tightening screws, inspecting the blades for damage, lubricating bearings, and ensuring the motor is protected from the elements.
Can this VAWT design be used to charge batteries?
Yes, with the appropriate electrical setup, including a charge controller, the VAWT can be used to charge batteries.
How important is the placement or location of the VAWT?
Placement is crucial for optimal wind exposure. Avoiding obstructions and placing the VAWT at an elevated position can enhance its performance.
Are there any legal or zoning considerations for installing a VAWT?
Depending on your location, there may be zoning laws or regulations regarding the installation of wind turbines. It’s advisable to check local regulations before installation.
Final Words
This DIY VAWT project embodies innovation and sustainability, offering a hands-on approach to harnessing wind energy. It’s a testament to the power of DIY ingenuity in renewable energy exploration.